Tutorial Thursday- Coloring with Prisma Pencils
Hey there this is DT Kerri and today I am sharing with you how I color with my Prisma Pencils. Now I do not have an Art Degree or anything like that I do this as a hobby. A couple of pointers to start is always use LIGHT PRESSURE..it is easier to add color then it is to remove color. If you struggle with pressure hold your pencil further back. Try to keep a sharp pencil and color in a small circular motion. I am going to provide you with a PRODUCT, COLOR LIST as well as step by step instructions. Hope you enjoy remember don’t give up Pencils take practice.
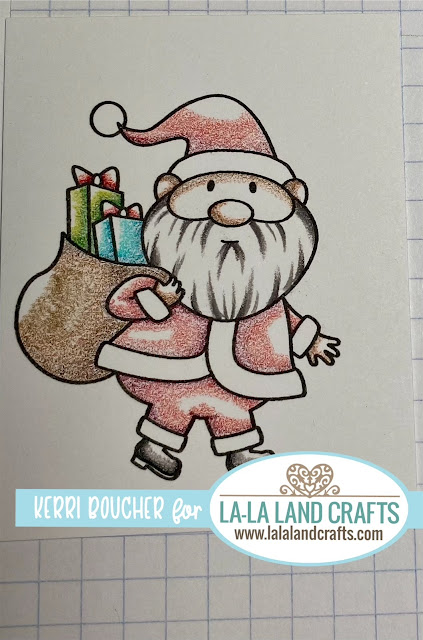
So here is the card finished now we are not going to make the whole card we are just going to color the Santa. Now if you want to color the Lights I did use the same Reds, Greens and Blues. First I am going to list the Products and the Pencils I used
PRODUCTS
PRISMA PENCILS
Skin- 946, 1082, 943, 939, 927, 937, 924
Suit- 937, 924, 923, 928, 1014 (or white 938)
Beard- 1056, 1054, 1052, 1051, 938
Toy Bag- 947, 1082, 941, 1084
Blue Gift- 105, 905, 992, 1089
Green Gift- 908, 911, 1005, 1004
Boots- 935, 1056, 1054, 1052
Glamour Dust used on Hat, Pants and Coat
COLORING TUTORIAL
Step 1
Gather all necessary supplies. I stamped my Image with MEMENTO TUXEDO BLACK INK onto white 100lb ACCENT SMOOTH PAPER. I always stamp at least two Images incase I mess one up I highly recommend this. Now we are going to get into the coloring!! Make sure you have a sharpener handy and remember keep your PRESSURE LIGHT!
Step 2
So for Step 2 we are going to apply the colors as follows
Skin- 946
Suit- 937
Beard- 1056
Toy Bag- 947
Blue Gift- 105
Green Gift- 908
Boots- 935
Remember to keep your pressure light on a scale of one to ten, one is where you want to be.
Step 3
Step 3 we are applying the second color. Your PRESSURE here still has to be a one
Skin- 1082
Suit- 924
Beard- 1054
Toy Bag- 947
Blue Gift- 905
Green Gift- 911
Boots- 1056
Your second color is going to hit the edge of your first color and extend a bit towards the center. It will also extend the line of your first color.
Step 4
Step 4 we are applying the third color. Keeping your pressure light and extended color further thus Image is starting to fill with color.
Skin- 943
Suit- 923
Beard- 1052
Toy Bag- 941
Blue Gift- 992
Green Gift- 911
Boots- 1054
Step 5
Step 5 is our fourth color keeping PRESSURE LIGHT and pencil sharp coloring in small circular motion
Skin- 939
Suit- 928
Beard- 1051
Toy Bag- 1084
Blue Gift- 1089
Green Gift- 1004
Boots- 1052
Step 6
Step 6 we adding the last of our colors to complete out first layer. If you do not see a part of the image listed in this step that means all of the colors have been used.
Skin- 927 this is the last color so all of skin should be done
Suit- 1014 last color
Beard- 938
Toy Bag- none done last step
Blue Gift- none done last step
Green Gift- none done last step
Boots- none done last step.
Now your image should be completely colored. This is only the first layer of color. The next Steps which would be 7 - 12 you are going to repeat steps 1 threw 6. The second layer you are going to increase your pressure a bit. I have pics to show you each of these steps
Step 7
Step 7 increase your pressure to a three out of ten using the same colors from step 2. Still color in small circular motions. You may want to extend your first color as well use my pictures if you are unsure. Having a reference is always good.
Skin- 946
Suit- 937
Beard- 1056
Toy Bag- 947
Blue Gift- 105
Green Gift- 908
Boots- 935
Step 8
Step 8 you are going back and using the colors from Step 3..try to keep your pressure at about a 2 or 3 out of ten
Step 9
As you can see your image is getting close to done. Here you are coloring with the colors from step 4.
Step 10
Step ten you are using colors from step 5.
Skin- 927
Suit- 1014
Beard- 938
Toy Bag, Gifts, Boots have no colors as they would have been done in the last step. Now your image is completely colored. If you want you can do a third layer if you like. Once again you will repeat steps 7 to 10.
Step 11
In this step you are going to cut your image out!!
Step 12
Now that you have cut your Santa out it is time to apply some GLITTER!!
You are now done your Santa he is ready to go onto your project. Thank you for stooping by and good luck and have fun CRAFTING!!
Make sure to join our LLLC FAN GROUP on Facebook for more ideas,
inspiration and a general chit chat about our products!
Click on the buttons below to find us on these social media sites:


Wow Kerri...what a detailed an awesome tutorial. You have me in awww of your card and your colouring!
ReplyDelete