MY INSPIRATION!!!

MY INSPIRATION!!!
Showing posts with label Tutorial. Show all posts

Thursday, March 19, 2020

Tutorial Thursday..Card Tutorial


Hello Everyone!
Kerri here and I'm so excited to share a fun tutorial on how you can create a card using a few Dies and a Clear Stamp Set.  These are perfect for all sorts of occasions and are a great way to put a smile on that special person receiving your card!


To complete this project, you will need:
Happy Heart Background Set
Long Flag Die
Heart Wreath Die
Great News-Clear Stamp Set

Time to Make the Card:

1. Gather your supplies as you will need a card base that measures 4 1/4 x 5 1/2.  Get yourself a piece of card board.  I just rip up my Amazon Boxes ( recycle )


2. Take your card stock I used black for the Heart Wreaths and white for the Long Flag and that is what the sentiment goes on.

3. Stamp your Image onto some white card stock and cut it out and your 

4. Arrange heart trio's and with small stapler put them together.  The second trio attach to flag with sentiment.


5. You need to color in your Panda here is a color listPrisma Pencils Used

Panda
935 Black, 1067 90% Cool Grey, 1065 70% Cool Grey, 1063 50% Cool Grey, 1061 30% Cool Grey, 1059 10% Cool Grey, White, 937 Tuscan Red, 925 Crimson Lake
Balloon
105 Cobalt Turquoise, 903 True Blue, 905 Aquamarine, 992 Light Aqua, 1086 Sky Blu


6. Panda is colored, sentiment is on flag, heart trio's are constructed now it is time to put it all together.  Using your Tape runner or an adhesive of your choosing  cut elements to your card.  Once you have glued your card down if you want the dots I have on my card I took some Acrylic Paint and a Stylus and made them.

Thanks for stopping by enjoy your day!!
HUGS 

Tuesday, October 9, 2018

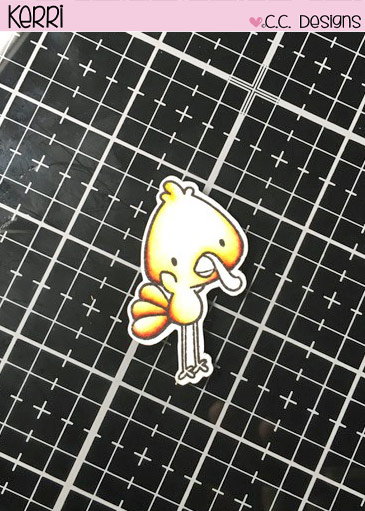
Tutorial Tuesday!!

Distress Inks Used
Body – Antique Linen, Fossilized Amber, Wild Honey, Aged Mahogany
Beck – Carved Pumpkin, Rusty Hinge
Gizzard – Fire Brick Red, Aged Mahogany
Legs – Black Soot


Instructions
Apply a thine line of Antique Linen along outer edge of Turkey. (head, body, and wing and tail just the one side)
Rinse Brush and blend out toward center of Turkey.  Let dry.  If you want you can repeat these two steps if you want it darker. I only did it once


 Using Fossilized Amber apply thin   line along the same side you did the Antique Linen on.
Rinse brush and blend out toward the center again. You can rinse brush again if the color is staying too strong.
If you look at pic below I also did around the beak.  Make sure to do the tail as well.
This is what it should loo like all blended out so far.


Wild Honey will be now applied the same way as above.  Let DryThis is what it looks like with the Wild Honey blended out! 


  Aged Mahogany is now applied. Once again, a VERY thin line to deepen the shading around CHEEKS, TAIL FEATHERS. Rinse brush blend out you may need to rinse brush twice.
Aged Mahogany applied to all of the areas and blended out


Carved Pumpkin is next up.  Apply thin line on the Beck look at photo. Rinse brush out and blend out to center of beck.


 Rusty Hinge is now applied the same as above and blended out the same way.  


 Gizzard time using FIRE BRICK RED apply thin line as per picture.  Rinse brush and blend out!


Almost done apply thin line of AGED MAHOGANY to outer edge of GIZZARD rinse brush out and blend out. Now the Final step is to fill in legs. Legs not done here but this is what you finished Turkey should look like with black legs. 

Stamp Set & Outline Dies THANKS just click the link and it will take you over the the C.C Design Store!
thanks for stopping by and sorry for the length