 |
| Ok there are alot of pics and I hope that these instructions are clear..I love doing the 3D work but it takes time and patience...the image I used is called Dad's Catch its from the High Hopes Collection and can be found here as well as the Copics, Pencils, Memento Tuxedo Black Ink and the Lijm by Olba..ONE CRAZY STAMPER... Now lets get down to business..you must stamp multiple images...I show you five but I would stamp seven.. |
 |
| the image you are going to use as the base take your W5 Copic and colour it in..this is shading |
 |
| colour face and part of hat as shown..follow pic the reason for the gray is to keep shading and it helps for layering.. |
 |
| once you have coloured and cut out your pieces I take a Memento Black marker and go around the outside..LORA taught me this little trip |
 |
| these two pics are just showing you the difference when you take the Marker to the outside edge.. |
 |
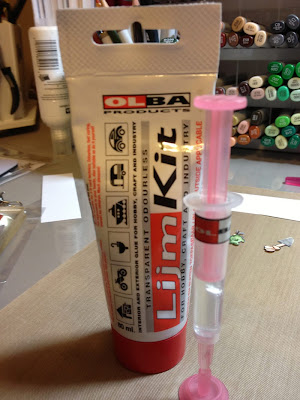
| this is the glue and syringe you will use to do the layering |
 |
| Arm with the face and part of the shirt.. |
 |
| Arm holding Fishing Pole.. |
 |
| Pants now |
 |
| hand with no pole arm attached |
 |
| Shirt now attached |
 |
| Face with piece of grey Hat |
 |
| Full Hat..almost done!! |
 |
| Last the hand holding the fish...holy mac.. |
 |
| layering should look like this.. |
 |
| This is the finished image on a card..thks for following me on this lengthy tutorial.. |
 |
| Copics Used!! thks again for following along and please take the time to create the end result is a reward... also please stop by the CHALLENGE BLOG and join in.. |


Cool tutorial! TFS.
ReplyDeleteI so love your card Kerri ! The little character is cute ! Love the warm colours and the paper too ! Hugs, blessings and love from Catherine
ReplyDeleteOh my Kerri, brilliant tutorial, your colouring is amazing, Liz x
ReplyDelete